As an Amazon Associate, we earn from qualifying purchases. We may also earn commissions if you purchase products from other retailers after clicking on a link from our site.
I love automating stuff, I remember when I was a kid, and I had one of those electric race tracks where the cars were driving around in a circle, and you would have a hand control to increase or decrease speed.
Back then, my automation skills were in the form of taping the button, so it wouldn’t go too fast and fall off, but not too slow, so it wasn’t exciting. Then I would leave home only to come back a few hours later to see it still doing its thing.
My skills have improved since, at least a little. In this article, I will try to describe how you can set up a basic, over the internet, way to control stuff on your catamaran or in your van!
Controlling Your Boat With an App
What Parts Do You Need?
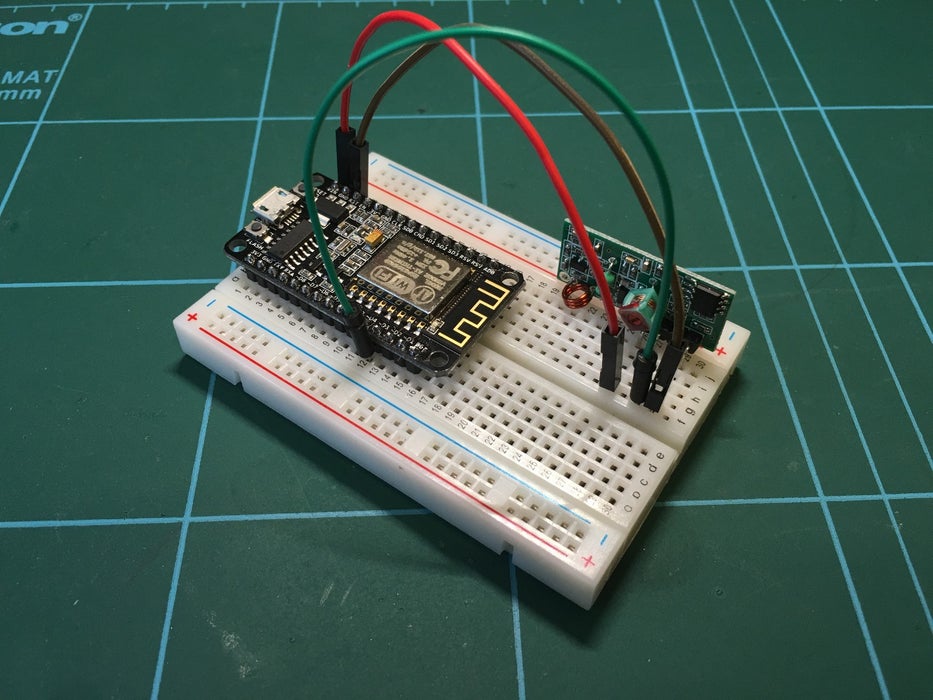
Hardware
- Internet connection (the NodeMCU connects your stuff to wifi, but you will still need something that connects it to the internet, I use an old mobile phone and switch it into a hotspot)
- NodeMcu
- Computer (for programming the NodeMcu)
- Jumper wires (10-20)
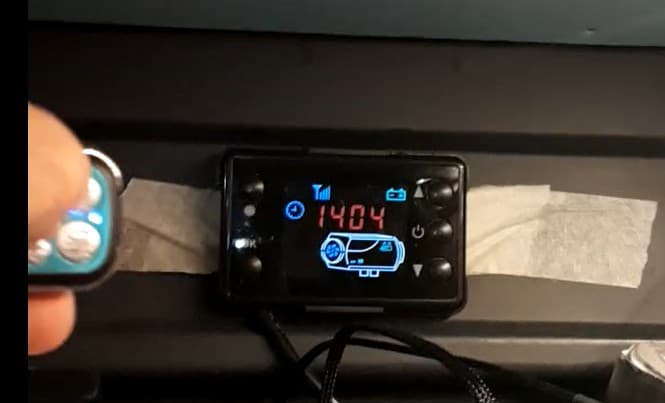
- RF transmitter (potentially a receiver as well)
- USB cable
Software
- Arduino IDE (https://www.arduino.cc/en/software)
- Arduino Code (From here)
Other needs
- Blynk account
- Some patience
How To Make It?
- Connect NodeMcu to the computer via USB and upload the code
- Make sure you update; Wifi name, wifi password, and auth token so that it matches your settings
- Disconnect USB
- Connect the jumper wires according to the pinout below
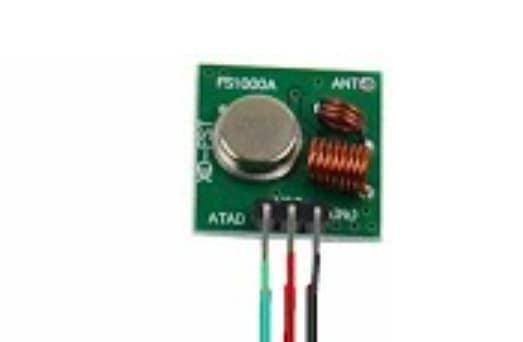
| Nodemcu | RF Transmitter |
| Ground | Ground |
| D2 | Data (atad) |
| 3,3v | VCC |
- Plug-in USB cable to power (computer, power bank, whatever)
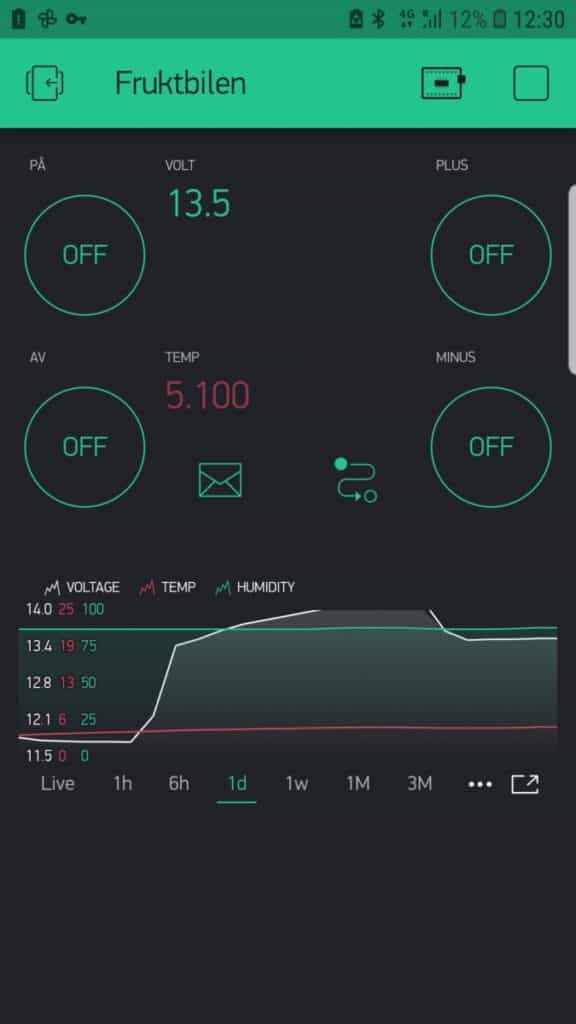
- Login to the Blynk app and configure it as a NodeMCU
- Make sure it connects to your nodemcu (by checking the top right of the screen)
- Add some buttons and connect them to the following virtual pins
| Virtual pin | Function | |
| V0 | Turn heater off | |
| V1 | Increase heat | |
| V2 | decrease heat | |
| V3 | Turn heater on |
- Now test your beautiful system!
Extra features inside the code
Some extra functions inside the code make it possible for sensors and google assistant control; contact me through the Youtube comments if you have any questions!
- Temp sensor DHT 11
- Humidity sensor DHT 11
- Voltage sensor (homemade or bought)
Ohh and by the way, it is also possible to set it up with google assistant so it works via voice!
Want additional features such as light switches?
In the version I’m using right now, it is possible to control lights over the app or via google assistant; this switch can control anything inside your boat! I use this function every day! I have also added a light sensor, so it tells me if I left the lights on.
If you are interested, either go to the youtube video above and comment or send me an email at [email protected] and ill send you the code with some instructions!